I Made the "Bootstrap Fashion" DIY Dress Form: Is it Worth the Hype?
- Katherine Sewing
- May 28, 2021
- 8 min read
Updated: Nov 2, 2021
I have been wanting a dress form for some time now, because they come in so handy for garment sewing. Both for fitting garments as well as draping custom patterns without having to worry about drafting and the math and measurements involved.

I have never had a dress form, and my goal has always been to create a custom dress form to match my own measurements. Up until recently, there was no way to accomplish this, because I was pregnant and huge at the time. So I satisfied myself with researching the subject: deciding I would use the popular “Bootstrap Fashion” dress form pattern, and watching countless Youtube videos about the making process.
Did the pattern turn out to be worth the hype? Let’s find out!
The Pattern
The Bootstrap Fashion pattern company specializes in creating custom patterns for your own measurements, and one of their most popular patterns is for a DIY dress form.

You follow the directions on their product page for taking your own measurements, input them all, and pay for your pattern. Shortly afterward, their computer generates your personal pattern as well as a preview of what your dress form will look like, and email them to your inbox.
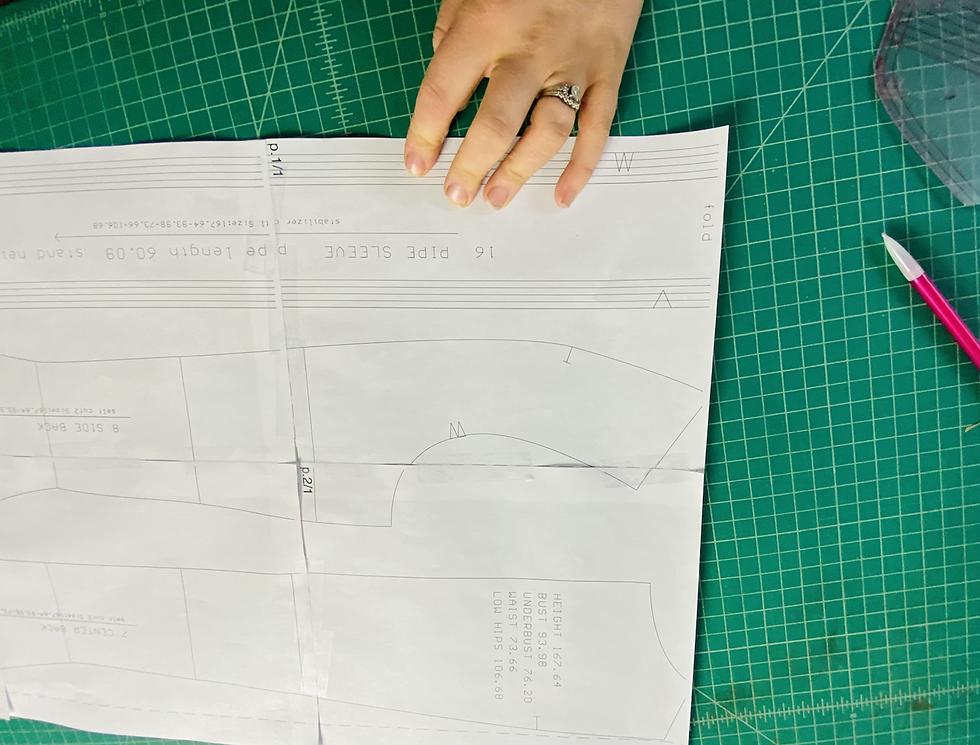
You print off the pages using your home printer, and tape them together.
This is how it works in theory, but I experienced a few hiccups along the way.
Measurements Process

I am about 6 months postpartum, and my body is still in a state of transition. I took my bust measurement accurately, but opted to give a tighter waist measurement, as I knew that would likely be smaller by the time I completed my dress form. At first, I chose the option for a rounder tummy shape, but by the time I was ready to sew my dress form I changed my mind about that. Watch on to see how I altered my pattern without needing to pay for a new pattern.
Pattern Hiccup

Although I’d requested a pattern with seam allowance, I received a pattern without seam allowance, and so contacted the company. In the process of this, I realized one of my measurements had actually been taken incorrectly. They reprocessed my pattern for $2, but then sent me another one without seam allowance!
Despite many people in the past attesting that their pattern took only 20 minutes to be generated, my patterns took a couple days. I didn’t want to wait any longer for a third pattern so I decided to simply add seam allowance manually.
Fabric Choices and Other Supplies

I wanted my dress form to look as much like a professional dress form as possible, so I choice off-white linen as my main body fabric.
The pattern recommends fusible woven interfacing for the body pieces, which I usually never use. I found some from an online fabric store. However, I didn’t end up using this, and went a different route. I’ll get into that in a moment. For the stabilizer fabric, which is used as the inner ‘skeleton’ of the dress form, I used off-white bull denim.
Dress Form Stand

When creating your own dress form, you will need some kind of stand or base. The pattern calls for a combination of PVC pipe for the inside of the dress form, and the bottom half of a coat rack, for the bottom of the dress form. This will fit into the bottom of the dress form pipe and in combination create the total height you need.
I didn’t want to fiddle with the pipe, and separate base. I wanted to find a dedicated dress form stand which would go up the full height of the dress form, eliminating the need for pipe.
I ordered what I thought was this, but when it arrived it was low quality and
only half the height I needed. Thankfully, I found another, much nicer dress form stand that did indeed go up the full height. Click here to see it.
Other supplies for this project included zippers, poly-fil stuffing, and sponge, which I found on Amazon.
Taping the Pattern Together

I experienced one more problem with the pattern, and that was in the taping together process. It’s possible I could have printed my pattern on the wrong setting, so I won’t put the blame on the company for this.
The instructions said to first cut off the border of one of the pages you would be taping together, and line them up that way. However, when I did this, I found the pattern shapes did not line up seamlessly.
When I taped together slightly differently, my pattern shapes lined up more or less perfectly.
Altering the Tummy Area

Just before I cut out my paper pattern pieces, I decided to alter the curviness of the tummy area on the pattern pieces. As afore mentioned, when entering my measurements on the website, I had selected to have a little tummy curviness drafted into the pattern. By the time I was ready to sew, I decided against this, but I didn’t want to pay for them to process a whole new pattern.
I located the section of the lower front pieces that corresponded to the tummy, and found the curvy section which was the tummy. Using my pattern master ruler, I redrew this line. I created a much shallower curved line, but not perfectly straight because that’s not natural for most people’s bodies.
Cutting Out Pattern Pieces

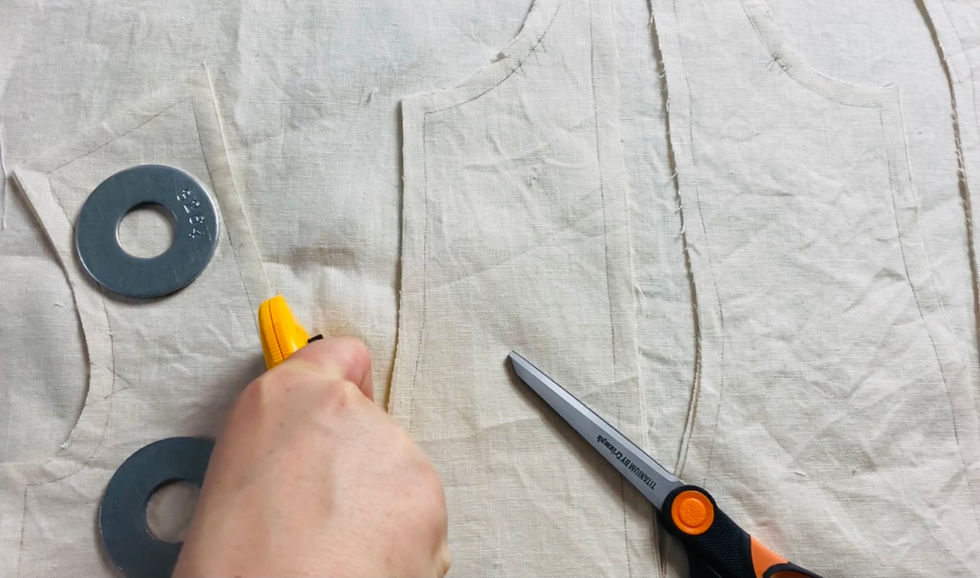
I laid out my washed and pressed linen fabric on the cutting table, and one by one, traced out the pattern pieces, along with the notch markings. The fabric was folded in half, so each that tracing would yield two mirror image panels.
Using my pattern master, I added a 1 cm seam allowance to each piece. This done, I cut out all of the pieces. I used the same method to cut the pieces out of the stabilizer fabric. I also cut out my base and armhole cover pieces out of cardboard from an old box.
Interfacing

I have always preferred using extra layers of fabric as interfacing, and had only bought the fusible stuff because that’s what the instructions told me to do. But I was not convinced that my fusible interfacing would actually lend enough strength to the dress form, especially since my outer fabric wasn’t especially strong.
I decided to follow my instincts and use an extra layer of linen as sew-in interfacing. Thankfully, there was enough leftover to do this. I cut out two extra layers of each pattern piece. I then pressed them in place before machine basting around the edges.
Now my fabric pieces felt strong enough for a dress form, while still having flexibility. I would later feel quite glad I had gone this route!
Sewing Panels Together

The first point about stitching is that I added a tad bit more negative ease than was already included in the pattern. They do draft negative ease into the pattern to allow for the fabric stretching when it is stuffed. But based on other people’s experiences of their dress forms turning out too large, I opted to stitch my seams with 4/8” seam allowance rather than 3/8”. As it turned out, I could have added even more negative ease, but more on that later.
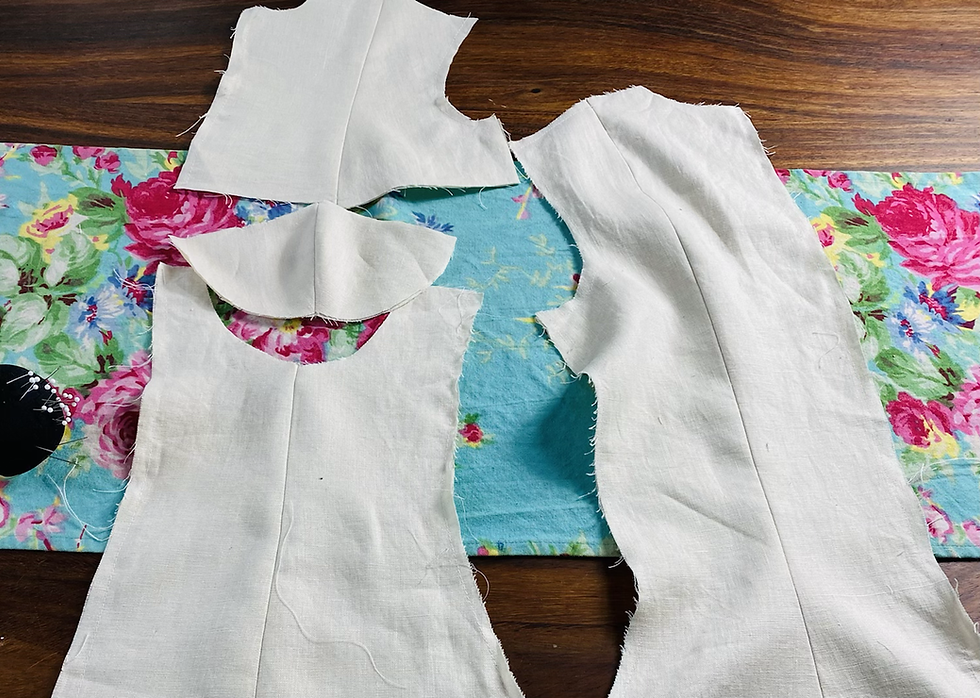
I followed the pattern directions, to begin with attaching the centre back and side back panels. I first pinned, matching notches, then machine stitched.
I followed the rest of the sewing directions, which the video above goes into detail showing. For the curved bust cup seams, I first hand-basted in place before machine stitching.
Neck and Armhole Covers

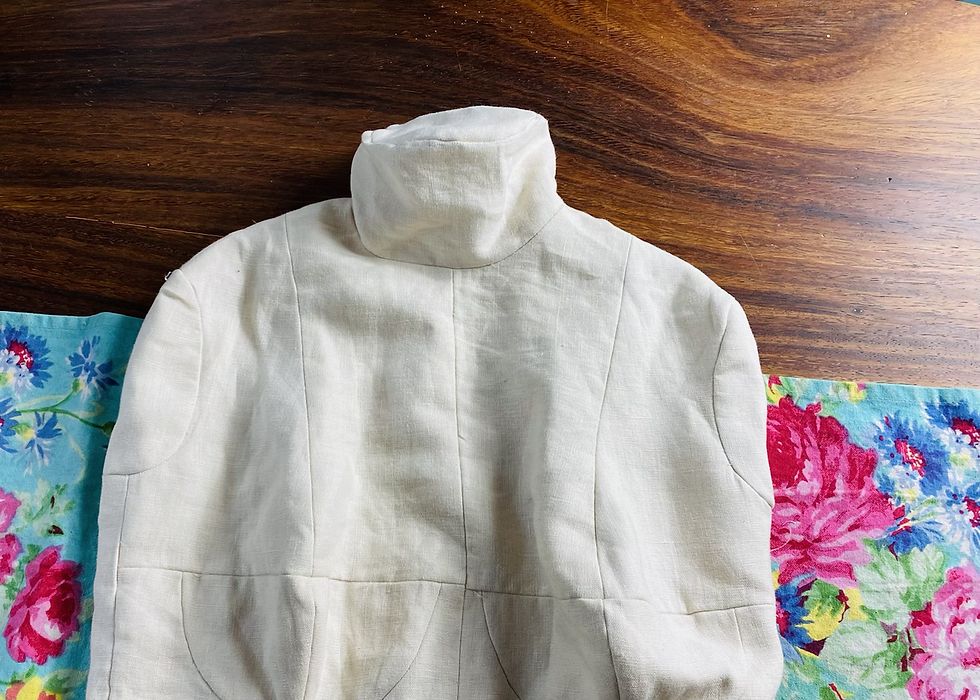
The neck of the dress form was comprised of what looked like a very tall straight collar, which I sewed directly into the neckhole, before closing the centre-back seam. Now it was time to add the neck hole cover. I pinned this in place, then machine stitched. Needless to say, this was a tricky, very curved seam.
I added the armhole covers in the same way, but I experienced a small problem here. Due to my adding more negative ease into all the body seams, my armhole covers were a bit too large, and I had to fiddle around to get them to fit into the armholes. One may have ended up a tad larger than the other, but who will notice?
Finally, the instructions told me to baste the armhole covers that were cut from bull denim to the inside of the armhole covers. But before they were totally attached, I had to insert the cardboard armhole cover between the denim and linen.
I had to trim the cardboard pieces to fit the now slightly smaller armhole covers.
Dress Form ‘Skeleton’

Now it was time to use that bull denim that I mentioned earlier! This fabric would be used to create the skeleton for the dress form. This would not only help hold her upright, but also hold the sleeve for the dress form stand or pipe to be inserted into.
Watch the video to see a big mistake I made at this point in the project!
Once my dress form’s “pipe sleeve” (I thought of this as her spine) to the front and back support pieces, I proceeded to sew around the borders of these pieces, as well as adding tons of random vertical stitch lines, to stiffen the fabric.

Finally came a part that was hard to understand at first in the directions. That was basting the inner skeleton to the centre front and centre back seams of the dress form body along the centre-front and centre-back seams.
Zipper Base

It was now time to create a zipper base for our dress form! There are four base pieces: two for each half. The first step was stitching these together along that centre seam, including the semi circle. This will create a nice finished edge for our zipper.
Then I basted my zippers in place, leaving the excess length hanging from the outer edges. Finally, I stitched the oval zipper base to bottom of dress form. This was a slow, difficult seam to sew.
I actually had to restitch some areas because I hadn’t caught enough of the under layer in the seam. Then I trimmed down this seam allowance, and turned her right side out!
Stuffing

The stuffing was way more difficult than I’d expected! It takes a lot of finesse to avoid lumps, while not stuffing her to be too large, which is the tendency.
But before the stuffing of the body came the neck, which was filled with three layers of sponge, glued together and cut into a circular shape (there was a pattern piece for this). The sponge was placed into the inside-out neck, and then turned right-side out.

I also realized that in order to get a corset on her, she had to be fairly squishy. I have quite a hollow or sway back shape, and I had to leave the back quite unstuffed and rather lumpy in order to get an accurate shape. If I were to redo this, I would draft some more curvature into the back pieces.
Finally, after the stuffing was deemed to be complete, I added in my cardboard base. In the end, I decided to cut out and add a second cardboard base piece for more support. Then, I glued my fabric fringe for the tube sleeve to the cardboard base.
Putting it on the Stand

Conveniently, the morning after finishing stuffing my dress form, my dress form stand arrived in the mail! Although it didn’t come with any instructions, it was pretty easy to assemble, and I simply slid my dress form into place! It isn’t quite as tall as I am, but I think I can fix that with a C-clamp to hold the upper pipe up a little bit higher on the base pipe.
Recommendations

If you are planning on making your own DIY dress form, and would like it to be on the firmer side, either sew it up with a larger seam allowance than the pattern provides, or when entering your measurements, enter the circumference measurements 1-2 cm smaller than they are. This should give you enough negative ease to be able to stuff your dress form firmly without allowing it to stretch too large.
I would also recommend using sew-in interfacing, or doubling up on the fabric you are using for the body, rather than using fusible interfacing since that could be too lightweight and allow your dress form to stretch more when stuffing.
Are you planning on making your own dress form? Have you already? If you have any questions or comments please leave them below!
Contact me at katherinelovessewing@gmail.com
#dressform #bootstrapfashion #sewingproject #dressforms #bootstrappatterns #DIYdressform #sewing #sewinglove #sewingmachine #sewingaddict #sewingpattern #sewingblogger #sewingpatterns #ilovesewing #sewinglife #handsewing #sewingisfun #sewingfun #sewingprojects #sewingblog #sewingtime #lovesewing #sewingtutorial
I know it’s been a while since you wrote this blog article, but I was really interested in what you had to say and wanted to throw in my “2-cents” anyway. Hope you don't mind.
I've been sewing for some 60+ years now. and made mine about 5 years ago if I remember correctly. The old brain cells don't work quite as well as they use to! (I've probably lost a few along the way 😁) I encountered a few of the same challenges you did:
1. Taping the pattern pieces together – Ugh! It was a nightmare, but I got it done.
2. Using the right fabric. I chose a medium weight unbleached canvas. But I DID take the…
I have bought the dress form DIY pattern a few weeks ago and I still haven't received my files. Do you recall the email your pattern was sent under??